Hey there, fellow digital enthusiasts! you know websites play a crucial role in establishing an online presence.
Websites are not just a collection of text and images; they are interactive platforms that engage users. One effective way to enhance user experience and navigate them to relevant content is by using hyperlinks. Hyperlinks allow users to click on a word or an image and be redirected to another webpage.
In this friendly guide, we will explore how to make a picture into a link using HTML, a markup language widely used for web development.
Table of Contents
HTML: The Magic Behind Web Pages
Let’s start with the basics. HTML stands for HyperText Markup Language. It’s the language that web developers use to structure and present content on the web. In simple terms, it’s the code that makes your website look and function the way it does.
Understanding HTML Links
HTML links, also known as hyperlinks, are elements that allow users to navigate between different webpages. These links can be in the form of text, buttons, or images. When clicked, they take the user to a new location specified by the link’s URL (Uniform Resource Locator).
The Power of Image Links
Picture this: you’ve got an awesome image on your website, and you want to give your users a seamless way to interact with it. That’s where image links come in! By turning images into clickable links, you can create a dynamic browsing experience for your visitors. They can simply click on an image, and boom! They’ll be whisked away to another page or perform a specific action. It’s like teleporting, but on the internet.

Let’s Make Magic: Turning Pictures into Links Using HTML
Now, let’s get down to business. Follow these simple steps to turn your pictures into clickable links using HTML:
Step 1: Preparing the Image
Before turning an image into a link, you need to ensure that you have the image file available and properly prepared. Here are the steps to follow:
- Choose the image you want to use as a link and make sure it is saved on your computer.
- Optimize the image by resizing it to an appropriate dimension. Large images may slow down your webpage’s loading speed.
- Consider adding descriptive alt text to the image. Alt text helps improve accessibility and is displayed when the image cannot be loaded.
Step 2: Insert the Image Tag
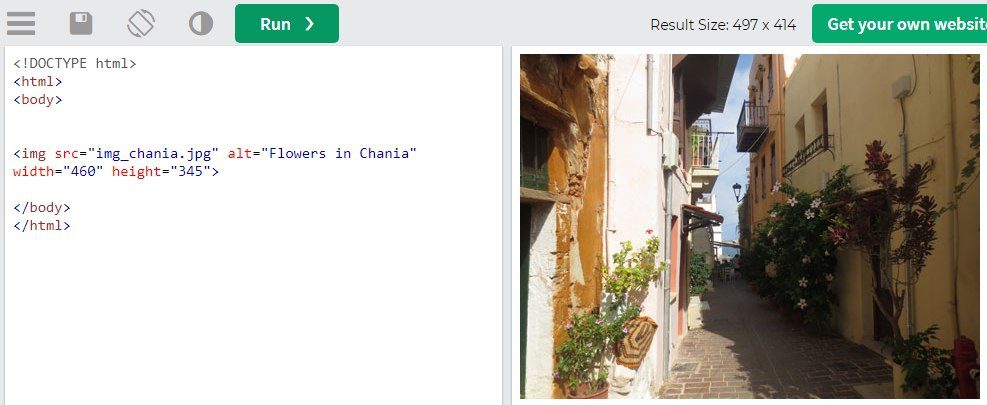
In HTML, the <img> tag is used to display images on a webpage. To insert the image into your HTML code, use the following format:
<img src="image.jpg" alt="Image Description">
Replace “image.jpg” with the file path or URL of your image. Additionally, provide a brief and descriptive text within the alt attribute to assist users who cannot view the image.
Step 3: Wrap the Image Tag with an Anchor Tag
To transform the image into a clickable link, wrap the <img> tag with an <a> tag, which represents an anchor or hyperlink. Here’s how you can do it:
<a href="https://example.com">
<img src="image.jpg" alt="Image Description">
</a>
Replace “https://example.com” with the URL or destination webpage you want the image link to direct users to.
Step 4: Add Additional Attributes (Optional)
You can further customize your image link by adding optional attributes to the <a> tag. Some commonly used attributes include:
- title: Provides a tooltip text that appears when the user hovers over the image link.
- target=”_blank”: Opens the linked webpage in a new browser tab or window.
- rel=”nofollow”: Instructs search engines not to follow the link.
<a title="Click here for more information" href="https://example.com" target="_blank" rel="nofollow noopener"><img src="image.jpg" alt="Image Description" /></a>
Step 5: Save and Test
Once you have added the necessary HTML code to create your image link, save the file with a .html extension. Open the file in a web browser to test the functionality of the image link. Clicking on the image should now direct you to the specified URL or perform the desired action.
Styling the Image Link
By default, HTML image links appear without any specific styling. However, you can enhance the visual presentation by applying CSS styles. Here are some common ways to style image links:
- Adding borders, shadows, or background colors to the <a> element.
- Applying hover effects to change the appearance of the image when the user hovers over it.
- Adjusting the image’s size using CSS properties like width and height.
- Aligning the image link within its container using CSS layout properties.
Experiment with different CSS styles to achieve the desired look for your image link. Remember to enclose the CSS rules within <style> tags in the <head> section of your HTML document.
Testing and Troubleshooting
Once you’ve created the image link, it’s crucial to test it in different web browsers and devices to ensure it functions correctly. Check the following aspects:
- Clickability: Verify that the image is indeed clickable and leads to the intended destination.
- Responsiveness: Ensure the image link behaves appropriately on various screen sizes.
- Compatibility: Test the image link on different web browsers to guarantee cross-browser compatibility.
- Alt Text: Confirm that the alt text is displayed when the image cannot be loaded.
If you encounter any issues, review your HTML and CSS code for any errors or inconsistencies. Validate your HTML markup using online tools to catch any syntax mistakes.
FAQs
Can I use any image format for the image link?
Yes, you can use various image formats such as JPEG, PNG, GIF, or SVG.
Can I link the image to an external website?
Absolutely! You can link the image to any URL, whether it’s an internal page or an external website.
Can I use the same image link multiple times on a single webpage?
Yes, you can reuse the same image link multiple times within your HTML document.
Is it possible to make only a portion of the image clickable?
Yes, you can use CSS techniques like image mapping to make specific areas of an image into separate links.
How can I track the number of clicks on the image link?
You can use web analytics tools or add parameters to the URL to track clicks using tools like Google Analytics.
Conclusion
Incorporating image links into your website’s design can significantly enhance user engagement and improve the overall user experience.
By following the steps outlined in this article, you can easily transform static images into interactive elements that drive user interaction and facilitate seamless navigation. Remember to use HTML’s <img> and <a> tags in combination to create visually appealing and functional image links.
By mastering the art of turning pictures into links using HTML, you can create compelling and interactive web content that captivates your audience and helps your website rank higher in search engine results.


